| Organic Seeds | Edible Plants | Organic Pest Controls | Books | Tools, Propagation & Fertilisers | Sprouting & Microgreens | Poultry Supplies | Specials & Gift Ideas |

Top

We will send an email to this address*
when is next available
* we will use this email address only for this notification and then we will delete it.
 Home
Home
Green Harvest Organic Gardening Supplies is permanently closed as of 5pm on 1-11-2023.
We will not be taking orders by this website, in person, by phone or email. Our display garden and retail shop are closed forever.
Read more...
Phone:07 54357000
Phone calls will only be responded to sporadically and only in reference to orders placed prior to 2-11-2023. All the useful growing and organic pest management research and resources are available on this website for a while still.
VARIATIONS ON A SPROUTING THEME © Frances Michaels
Microgreens or how to produce salad greens in the heat of summer - or when you only have a kitchen bench available and no garden.
Microgreens, salad mix, mesclun and baby leaf are new terms for many gardeners. So what are they and are they worth growing in the home garden?
What are Microgreens?
Microgreens are basically many of the same leafy greens as are used for salad mixes but are cut at a smaller stage and only harvested once. They are eaten as thin, delicate plants, the smallest possible variation on salad greens and herbs. They provide texture and colour when used as garnish, or exciting flavours when used as part of a salad mixes. Think of microgreens as a cross between a salad mix and sprouts. Sprouts belong in the province of the kitchen and are not really part of the gardener's domain. While sprouts are well known for their health benefits they are not famous for their flavour whereas microgreens are both healthy and a taste sensation. Green Harvest Salad Mix can be also be used as a delicious, nutritious microgreen mix.
For more information on growing Salad Mix or to order Salad Mix seed.
Download for free: Green Harvest Sprouting, Wheatgrass and Microgreen Guide (625KB)
 Why Grow Microgreens?
You don't need a garden, just sunlight, to produce abundant supplies of nutritious microgreens.
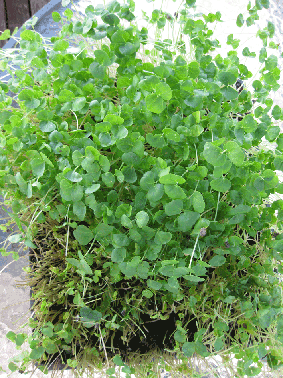
How to Grow Microgreens
Microgreens are best grown in seedling trays or recycled styrofoam boxes. They differ from sprouts in that they are grown in sunlight and usually harvested when there are 4 or more true leaves whilst sprouts are eaten much smaller. For your soil mix choose between organic, potting mix (look for an organic certification number on the bag), cocopeat, vermiculite, sieved compost or worm castings. If the trays or boxes have large holes in the base that allow the soil mix to leak out, try covering the base first with a single sheet of slightly moistened newspaper. To grow a batch of microgreens fill the tray with your selected soil mix 2 - 3 cm deep and moisten the mix. Soak the seed overnight then sprinkle the seeds evenly on top of the mix and gently pat them down; then cover with 0.5 cm of mix. Cover the tray with a lid or another inverted tray to help keep the seeds moist until they sprout. Water often using a sprayer. Adding diluted organic nutrients e.g. kelp or compost tea to the sprayer will improve the nutrient levels in the microgreens. When a microgreen tray is finished, add it to the compost or offer it to your chooks. These general instructions apply to the suggested vegetable choices below. There are also more specific instructions for grains such as wheat grass.
Where to Grow Microgreens
You can grow them indoors on a well-lit bench or outdoors on a covered deck or in a shadehouse. Indoors start them in a warm place like a kitchen then once they sprout they should be moved to a window or sunny spot.
How to Harvest Microgreens
Microgreens are usually harvested when there are four or more leaves. Cut the shoots just above ground level with scissors. Many types will regrow and can be cut several times. Afterwards the tray contents can be added to the compost heap.
Safety tips: Use only organically certified or untreated seed. Avoid seed that may have been fumigated or treated with a fungicide.
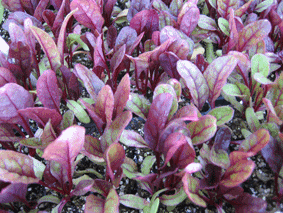
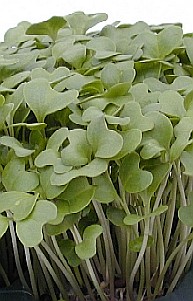
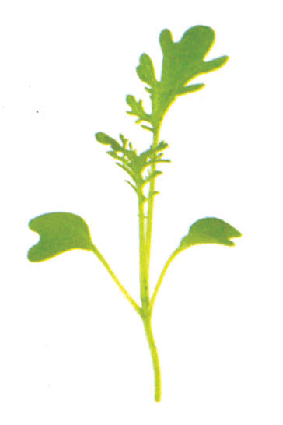
Green Harvest Choices for Microgreens
|
Amaranth Basil Beetroot Broccoli Buckwheat |
Cabbage Chicory Daikon Radish Endive Garlic Chives |
Golden Purslane Kale Kohlrabi Lettuce Linseed |
Millet Mustard Mizuna Orach Parsley |
Pea Perilla Rocket Salad Mix Shungiku |
Silverbeet Spinach Sunflower Tatsoi |
|
|
|||||
Home
Green Harvest Organic Gardening Supplies is permanently closed as of 5pm on 1-11-2023.
We will not be taking orders by this website, in person, by phone or email. Our display garden and retail shop are closed forever.
Read more...
Phone:07 54357000
Phone calls will only be responded to sporadically and only in reference to orders placed prior to 2-11-2023. All the useful growing and organic pest management research and resources are available on this website for a while still.
We guarantee our seeds to the value of the purchase price. We are happy to replace the seeds, give you a credit or refund, whichever you prefer. Other than our guarantee to the extent of the purchase price Green Harvest gives no other warranty expressed or implied. No liability will be accepted by Green Harvest, its owners or employees as to the accuracy of any information. No responsibility will be taken for damage to property or persons due to information given about a product or technique. No responsibility will be taken for the loss of a crop or income due to information given about a product or technique.
 Shopping here is private and secure.
Copyright © 2001 - 2024 Green Harvest Organic Gardening Supplies
No part of this website may be reproduced without permission of the owner