| Organic Seeds | Edible Plants | Organic Pest Controls | Books | Tools, Propagation & Fertilisers | Sprouting & Microgreens | Poultry Supplies | Specials & Gift Ideas |

Top

We will send an email to this address*
when is next available
* we will use this email address only for this notification and then we will delete it.
 Home
Home
Green Harvest Organic Gardening Supplies is permanently closed as of 5pm on 1-11-2023.
We will not be taking orders by this website, in person, by phone or email. Our display garden and retail shop are closed forever.
Read more...
Phone:07 54357000
Phone calls will only be responded to sporadically and only in reference to orders placed prior to 2-11-2023. All the useful growing and organic pest management research and resources are available on this website for a while still.
SPROUTING GUIDE
© Frances Michaels

Sprouting is an easy way to add essential vitamins and enzymes to your diet. Other advantages to doing your own sprouting:
- It is simple and quick; only very basic equipment is needed.
- There is a wide choice of taste sensations; sprouts are usually eaten raw but some (lentils, soybeans, chickpeas) require light steaming.
- Commercial sprouts do not always use organic seed, so growing your own gives you that chance to increase your organic consumption.
- It takes very little space in the kitchen and allows you to grow some of your food without actually needing a garden.
- It is very economical, sprouts can multiply by up to 15 times their weight.
- It allows you to reduce your food miles by supporting your local grower - you!
 Steps to Successful Sprouting
- Sprouts can be produced all year round but keep in mind that the same rules apply as for successful seed germination in the garden. Just like all other seed, sprouting seed has a temperature range that is best for germination. Avoid very hot or cold periods; temperatures between 20°C - 28°C work best. In winter a heated propagator tray can be helpful.
- Wash the seeds well in fresh water before soaking. Float off any leaf or twig debris. Small seeds that float off are usually not viable. The exception is onion which has to be encouraged to sink.
- Soak the seeds for the correct time; do not over or under soak. Over-soaking can kill your sprouts. Good aeration with a plentiful supply of oxygen gives life to the seed, so avoid soaking too much seed at a time and then overcrowding it in the sprouter. Never put the sprouting jar or bag flat to a surface where air cannot reach the seeds; all living things need to breathe. Poor drainage will also cause the seed to rot.
- Rinse at least twice a day. During hotter weather, rinse more often. Thorough rinsing is important as the water provides the moisture needed to activate growth, it also flushes away waste products and re-oxygenates the seed, but be gentle. If you can’t be at home on hot days, refrigerate the sprouts until you get back. Under-rinsing will cause the seeds to shrivel and die, as will hot, direct sunlight. If seeds start to dry out, soak briefly and then drain well.
- Only start sprouts if you are available to look after them for the next 3 - 5 days.
- To produce green, leafy sprouts, daylight is important but always avoid direct sunlight. A kitchen bench is ideal for access to the sink for rinsing but windows need to provide sufficient light.
- Once the sprouts are ready, store them in the fridge. Washing well first in a bowl of water will separate unsprouted seeds and some of the seed coats. This is particularly important with harder seeds such as mung beans. The hard seeds will stay on the bottom of the bowl allowing the sprouts to be scooped off the top. Sprouts store best when well drained, even dry to touch, in a container that breathes. They will go slimy pretty quickly in a plastic bag. Rinsing every few days and draining well will prolong their storage life.
- Any soaked seed or sprouts that are even slightly mouldy should be discarded.
Download for free: Green Harvest Sprouting, Wheatgrass and Microgreen Guide (625KB)
Different Types of Growing Containers
 Different seeds need different growing methods to be successful.
Trays
Tray sprouters are flat with drainage holes. They allow leafy sprouts to grow straight up and receive maximum light. They can be as simple as using a seedling tray or be a multi-level sprouter with a lid and drainage tray. Multi-level tray sprouters make it easy to produce a continuous supply of sprouts, by starting an additional tray every few days.
 They are particularly useful for sprouts where the seed hulls are hardy and too chewy to eat and where just the green
tops and stems are harvested, by cutting off with scissors. This group includes delicious sprouts like buckwheat and
sunflower, and most of the grain sprouts like wheatgrass, barley and oats.
They are particularly useful for sprouts where the seed hulls are hardy and too chewy to eat and where just the green
tops and stems are harvested, by cutting off with scissors. This group includes delicious sprouts like buckwheat and
sunflower, and most of the grain sprouts like wheatgrass, barley and oats.Jars
To make your own jar sprouter choose a large glass jar with a wide, straight neck. Flywire or cheesecloth and a rubber band provide the lid. The covering needs to allow sufficient drainage and aeration, or mouldy sprouts will result. The jar sprouter works well as it comes with a built-in drainage stand. It is particularly important not to overcrowd the seeds in jar sprouters.
Automatic Sprouters
Electric tray sprouters are available and worth considering if your time is limited for giving the sprouts enough rinsing etc.
Hint: Only mix sprouting seeds together that have a similar growing time and requirements.
Microgreens, salad mix, mesclun and baby leaf are new terms for many gardeners. So what are they and are they worth growing in the home garden?
You can find Microgreens Growing Information here.
You can find Salad Mix Growing Information here.
| Seed Type | Soaking Time | Quantity of Seed | Rinses per day | Yield | Days to Harvest |
| Alfalfa | Wash seed then soak 3 - 6 hours | 1.5 tbsp | 2 - 3 | 1½ cups | 3 - 5 |
| Broccoli | Wash seed then soak 4 - 8 hours | 2 - 3 Avoid seeds clumping |
1 - 1½ cups | 3 - 6 | |
| Buckwheat | Wash seed then soak 20 - 30 minutes | 1 cup | Twice a day | 1½ - 2 cups | 24 - 48 hours |
| Chickpea | Wash seed then soak 8 - 12 hours | 1 cup | 3 - 4 | 2½ - 3 cups | 2 - 4 |
| Fenugreek | Wash seed then soak 8 - 10 hours | 1.5 tbsp | 1½ cups | 2 - 5 | |
| Lentil | Wash seed then soak 5 - 12 hours | 2 - 3 | 1 - 1½ cups Wash off hulls & remove hard seeds that have not sprouted on final rinse |
4 | |
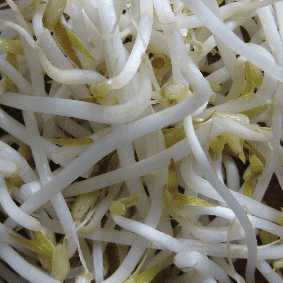
| Mung Bean | Wash seed then soak in warm water 6 - 12 hours | 4 - 5 | |||
| Mustard | Wash seed then soak 8 hours | 2 - 3 Avoid seeds clumping |
3 - 6 | ||
| Onion | Wash seed then soak 8 - 12 hours | 2 - 3 tbsp | 2 - 3 | 10 - 12 | |
| Quinoa | Wash seed then soak 20 - 30 minutes | ⅔ cup | 3 | 1½ cups | 24 - 48 hours |
| Radish and Daikon | Wash seed then soak 6 - 12 hours | 1.5 tbsp | 2 - 3 Avoid seeds clumping |
1 - 1½ cups Wash off hulls on final rinse |
3 - 6 |
| Red Cabbage | Wash seed then soak 4 - 8 hours | 1 - 1½ cups | |||
| Soybean | Wash seed then soak 15 - 24 hours | 1 cup | 3 - 5 | 3 - 4 cups | 3 - 5 |
Home
Green Harvest Organic Gardening Supplies is permanently closed as of 5pm on 1-11-2023.
We will not be taking orders by this website, in person, by phone or email. Our display garden and retail shop are closed forever.
Read more...
Phone:07 54357000
Phone calls will only be responded to sporadically and only in reference to orders placed prior to 2-11-2023. All the useful growing and organic pest management research and resources are available on this website for a while still.
We guarantee our seeds to the value of the purchase price. We are happy to replace the seeds, give you a credit or refund, whichever you prefer. Other than our guarantee to the extent of the purchase price Green Harvest gives no other warranty expressed or implied. No liability will be accepted by Green Harvest, its owners or employees as to the accuracy of any information. No responsibility will be taken for damage to property or persons due to information given about a product or technique. No responsibility will be taken for the loss of a crop or income due to information given about a product or technique.
 Shopping here is private and secure.
Copyright © 2001 - 2024 Green Harvest Organic Gardening Supplies
No part of this website may be reproduced without permission of the owner